

Purpose
The purpose of this quick reference guide is to step through the process of setting up a Payment Entity record. The intended audience for this document is System Administrators / Standard Users.Steps
Create a new Payment Entity record
The Payment Entity record holds company information related to the Employer processing payments to Employees in Pay Batches. Create a new Payment Entity by following the steps below:- Go to the Accounts object and click on the New button (see Figure 1).

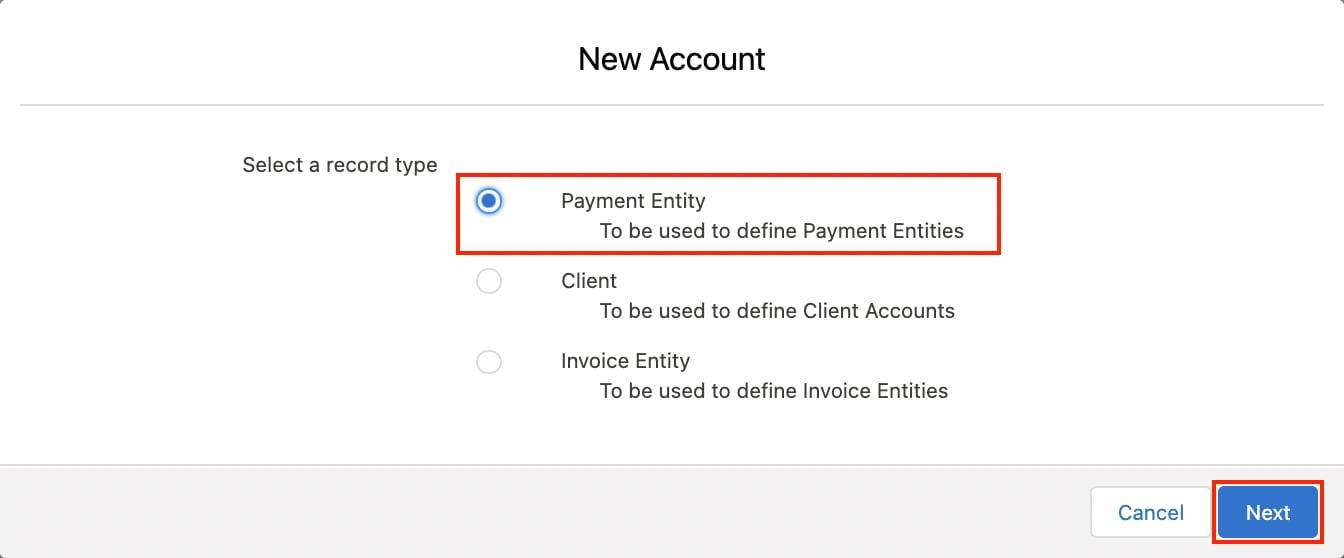
- Choose the record type Payment Entity and click Next (see Figure 2).
- Populate the following required fields to detail the record’s identifying information (see Figure 3):
- Record a name for the Payment Entity by populating the Account Name field.
- If this record relates to an existing Payment Entity, use the Parent Account lookup field to link the records.
- Use the ABN field to capture the Australian Business Number for the Payment Entity.
- Enter the Payment Entity’s Branch for use in STP Lodgements by populating the Branch field.
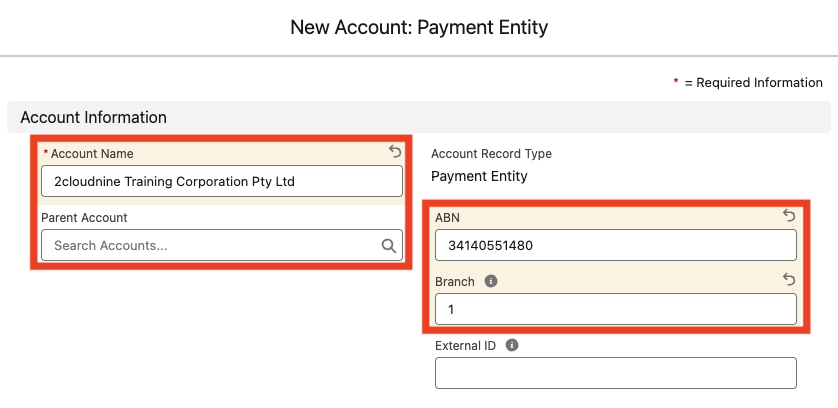
Payment Entity Account InformationThe External ID field is used to reference corresponding records from external systems. This field is only applicable if completing data import using the Integrated Import Tool.
- Populate the following required fields to capture Payment information for the Payment Entity (see Figure 4):
- Nominate acceptable payment types by populating the Chosen column in the Available Payment Methods field using the arrow buttons provided.
- Determine whether each new Payment File requires review and approval prior to creation by selecting from the Payment Files Require Approval picklist field.
- Specify whether a separate Payment File Line containing the Pay Batch PAYG Total is required on related Payment Files by selecting from the Include PAYG in Payment Files? picklist field.
- Select Yes for Payment Entities using Australian Bank Transfers, to include a separate Payment File Line specific for the PAYG Total Value reported in the Pay Batch.
- Select No if PAYG Remittance is processed externally from 2cloudnine Payment Files for this Payment Entity.
- If Yes is selected in the Include PAYG in Payment Files? field, Users are required to specify the bank details for PAYG Payments by populating the following fields:
- PAYG Bank Branch Code
- PAYG Bank Account Number
- PAYG Bank Account Name
- Enter the ATO Payment Reference to be included on the PAYG line of your Payment File using the PAYG Payment Reference Number (PRN) field.
- Use the Maximum Payment Distributions field to define the total amount of payment distributions allowable (from 1 - 5) per Payee.
- Populate the following optional field as required:
- To include a specific message on Pay Advice PDFs generated for this Payment Entity, populate the Pay Advice Message field.
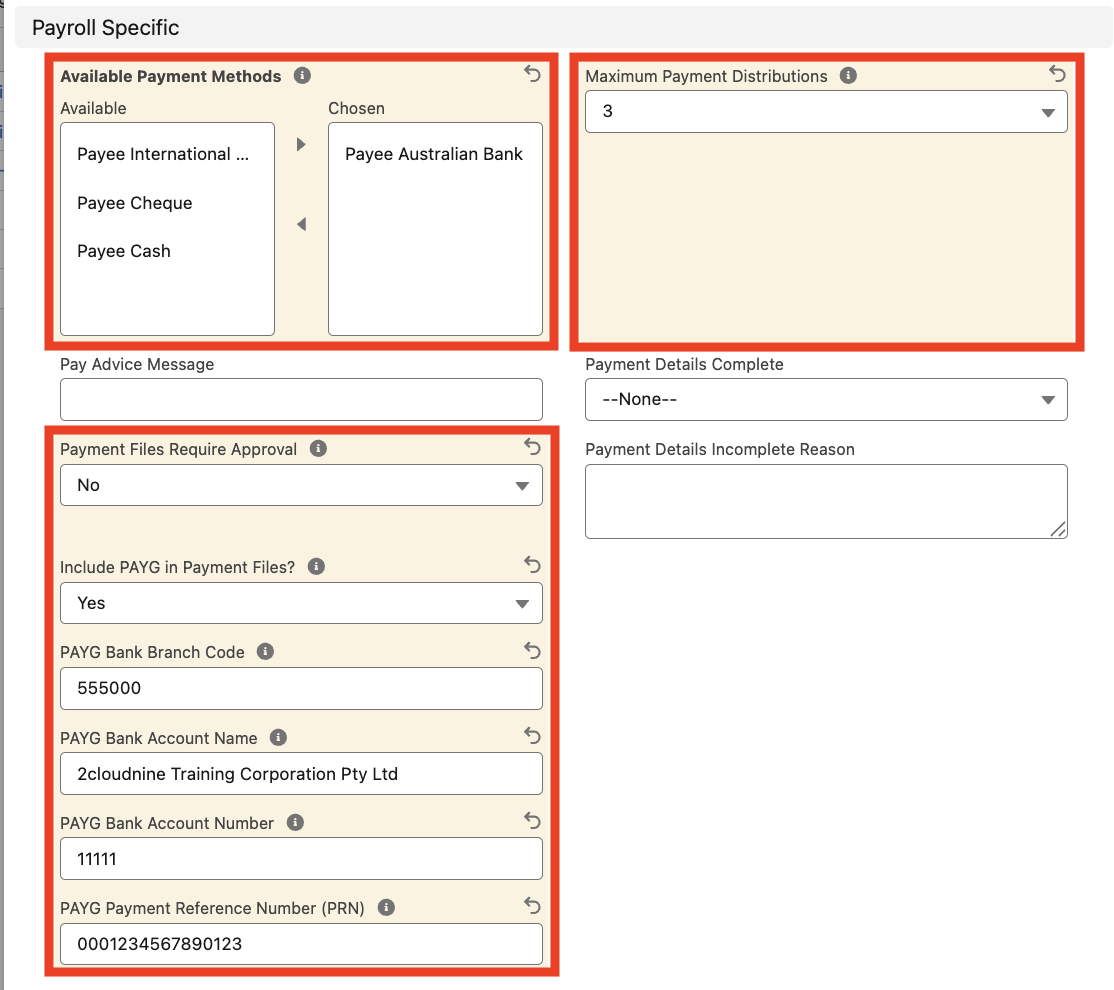
Payment Entity Banking DetailsThe Payment Details Complete / Payment Details Incomplete Reason should not be manually populated, as system automation will update these values once the record has been saved.If Yes is selected in Include PAYG in Payment Files, bank account information MUST be completed.
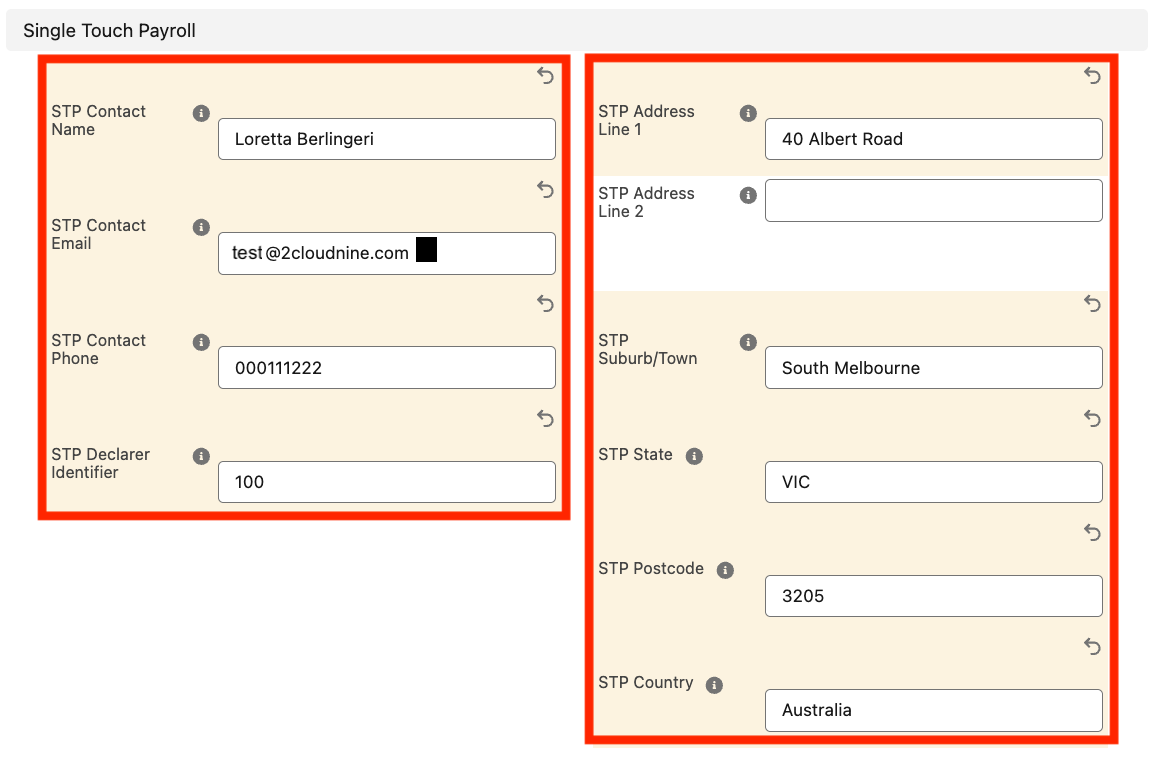
- Populate the following fields to provide the Single Touch Payroll (STP) Contact information (see Figure 5):
- STP Contact Name
- STP Contact Email
- STP Contact Phone
- STP Declarer Identifier
- STP Address Line 1
- STP Address Line 2
- STP Suburb/Town
- STP State
- STP Postcode
- STP Country
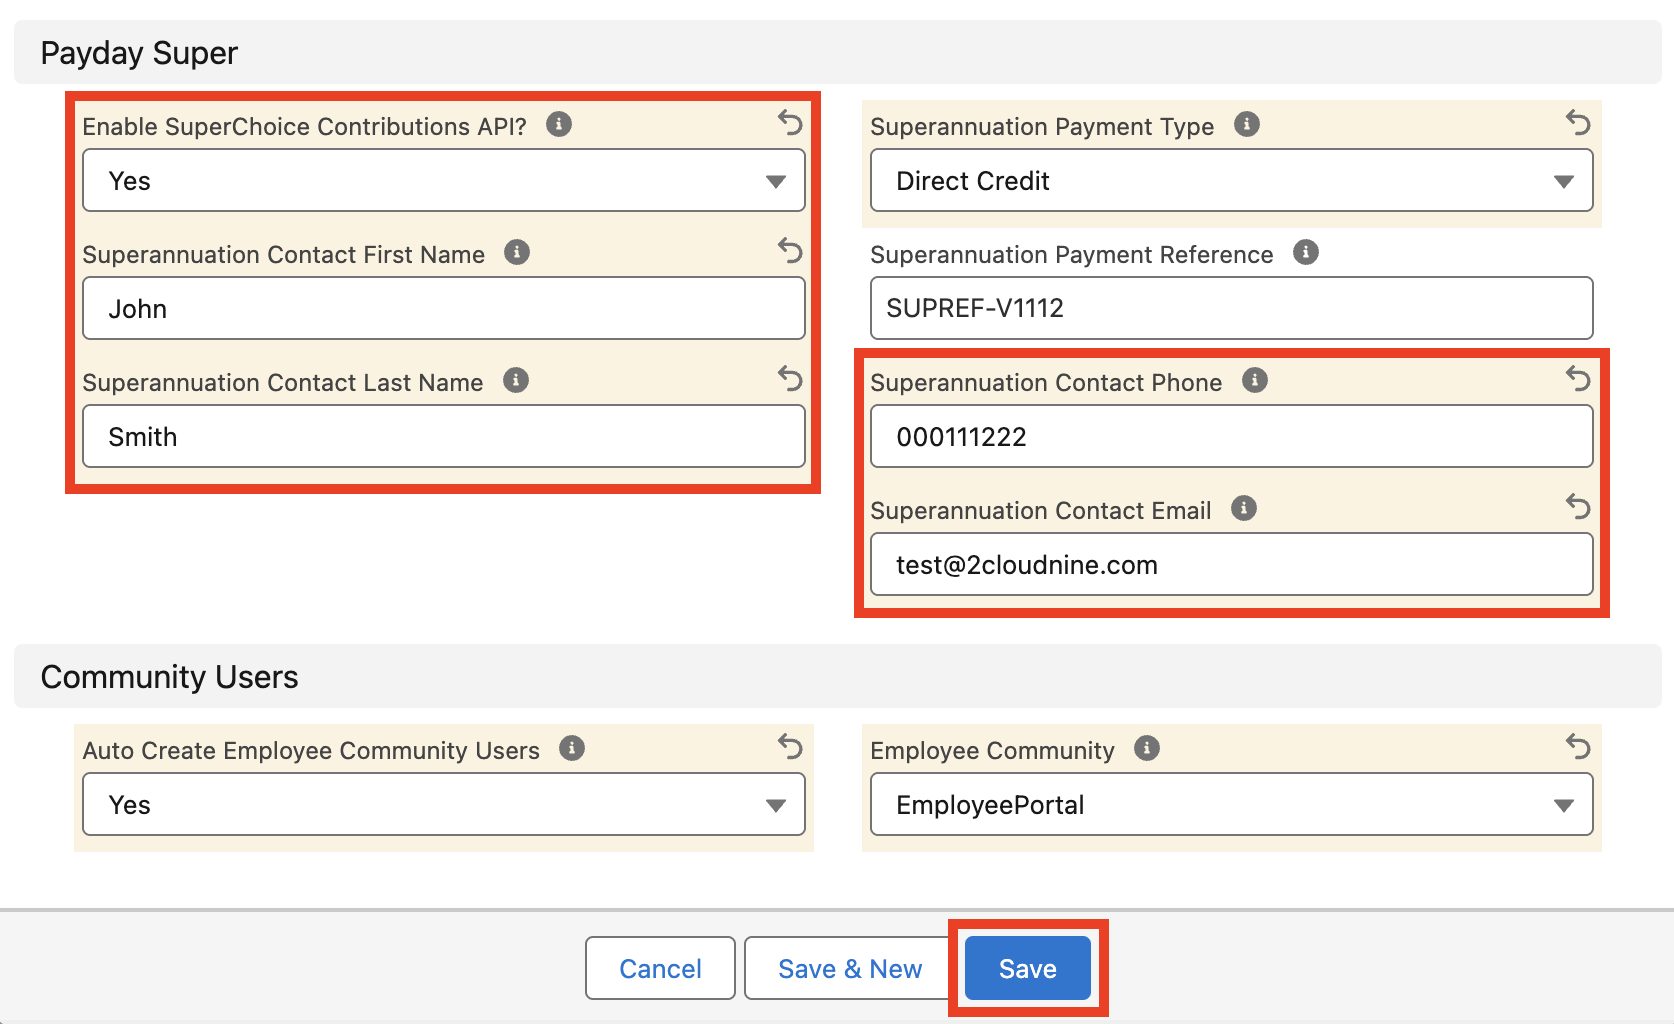
- Populate the following fields to provide the Superannuation details:
- Enable SuperChoice Contributions API?
- If Yes was selected for Enable SuperChoice Contributions API?, the following additional fields must be populated:
- Superannuation Contact First Name
- Superannuation Contact Last Name
- Superannuation Contact Phone
- Superannuation Contact Email
- Superannuation Payment Type
- Superannuation Payment Reference
- Populate the following fields to provide the Payroll Specific details (see Figure 6):
- Determine whether related Employees are automatically provisioned with Community User access by populating the Auto Create Employee Community Users picklist field.
- If Yes, Users must also select the applicable Site from the Employee Community picklist field.
- Determine whether related Employees are automatically provisioned with Community User access by populating the Auto Create Employee Community Users picklist field.
- Click on the Save button.
ABN Lookup via Payment Entity RecordOnce saved, the ABN Lookup field will display a link that may be selected to launch a lookup to the Australian Business Register website and display the details of the entered ABN.
- A new Payment Entity record has been created and is ready for use in Assignments, Payees and other related records (see Figure 7).
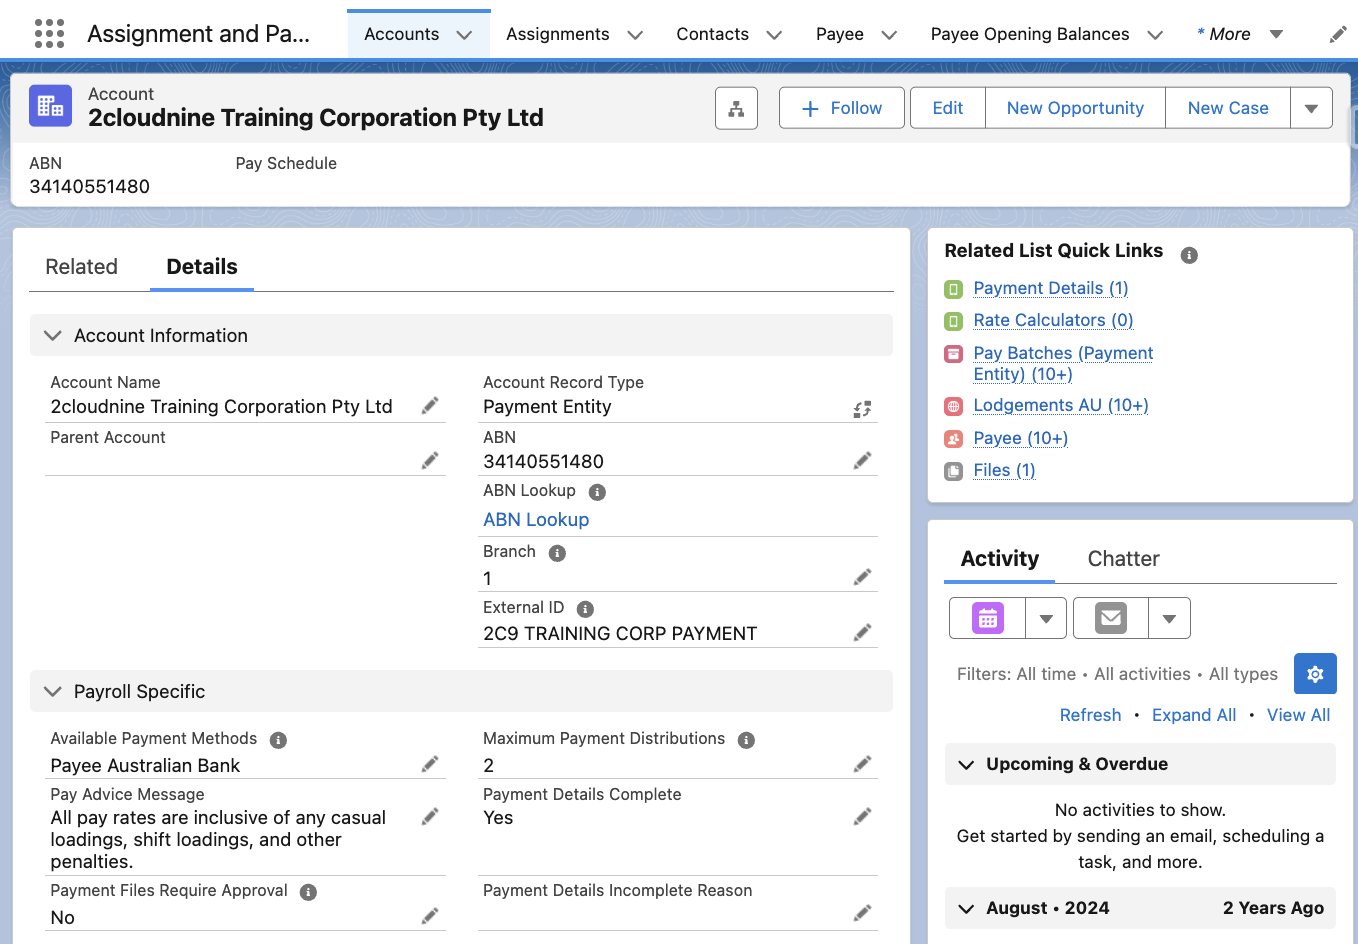
- To modify an existing Payment Entity record, open the required record and select the Edit button available on the top right side of the page. You can also double click in any of the fields that need editing or just click on the pencil icon that appears within fields when you move your cursor over the field.
- When complete, click on the Save button.
Payment Entity Record ManagementPayment Entity records CANNOT be deleted if they have related records or are used in other records. Deleting records is not recommended unless absolutely essential.
Upload Payment Entity Logo
If the new Payment Entity requires a specific Logo to be displayed on associated Pay Advice Files (i.e. where no logo exists on the active Pay Advice Template), you can upload an image via the Files tab from the record’s Related list. The logo file must have the following specifications:- Must be uploaded to the Files tab.
- The logo needs to be:
- Smaller than 20 kb.
- File format must be gif, png, or jpg
- File name must contain the word ‘logo’ (i.e. it could be either logo.jpg or Companylogo.gif or PayAdvicelogo.png or something similar).
- Go to the Accounts object and open the Payment Entity record (see Figure 8).

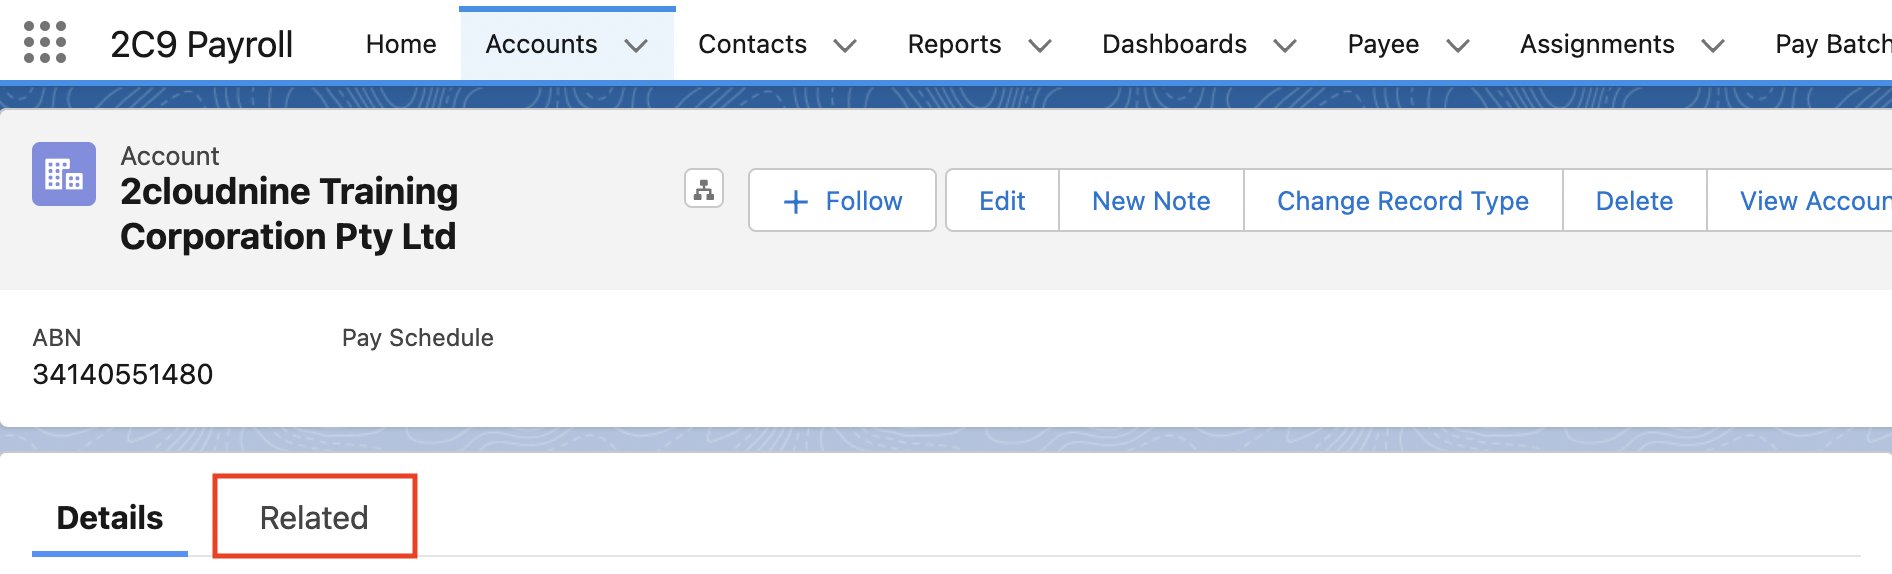
- Click on the Related tab (see Figure 9).
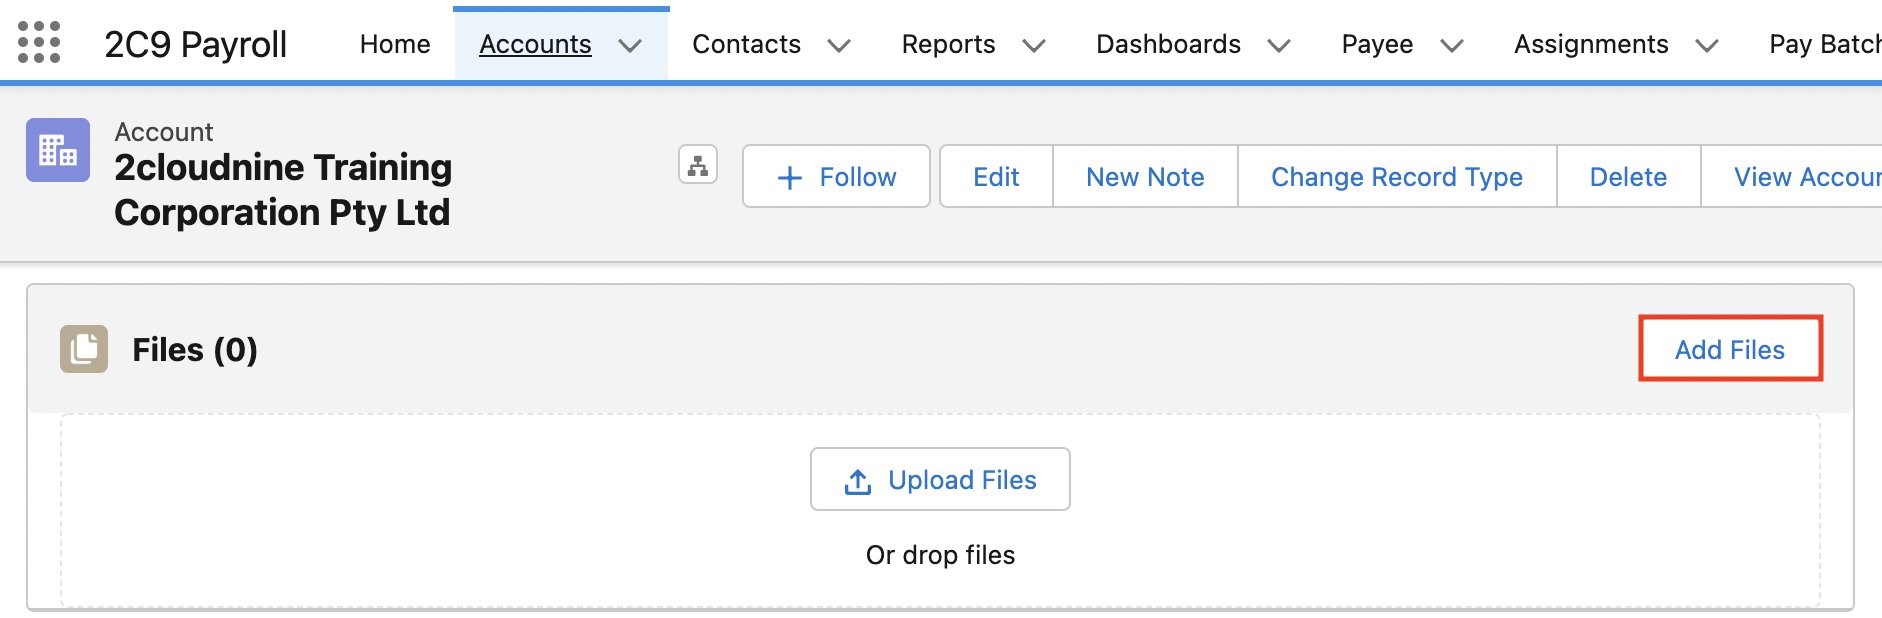
- Click on the Add Files button (see Figure 10).
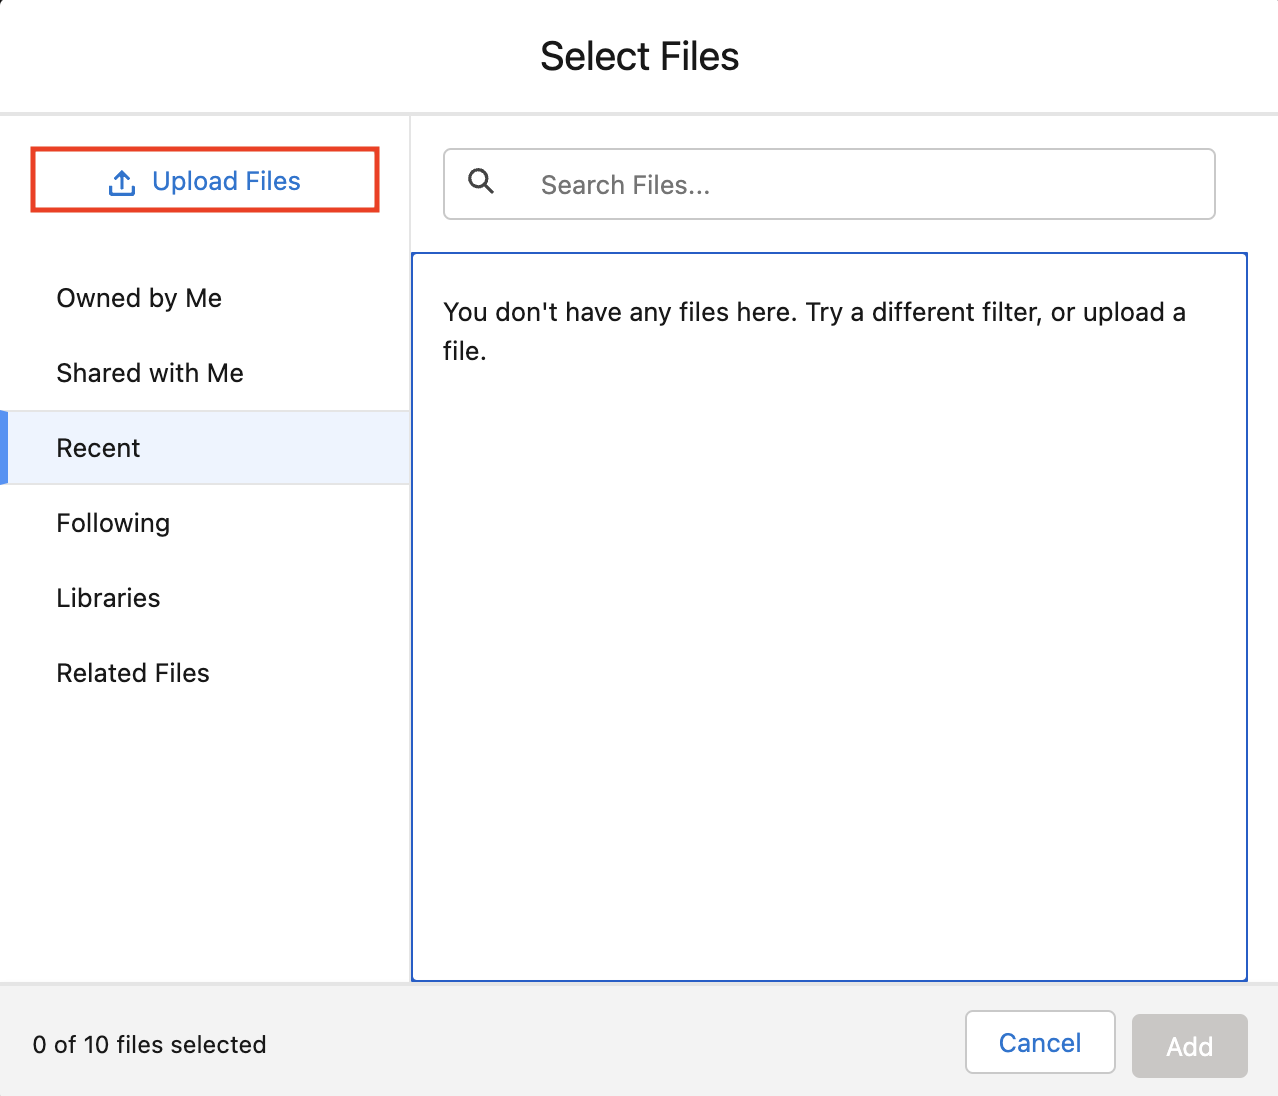
- Click on the Upload Files button (see Figure 11).
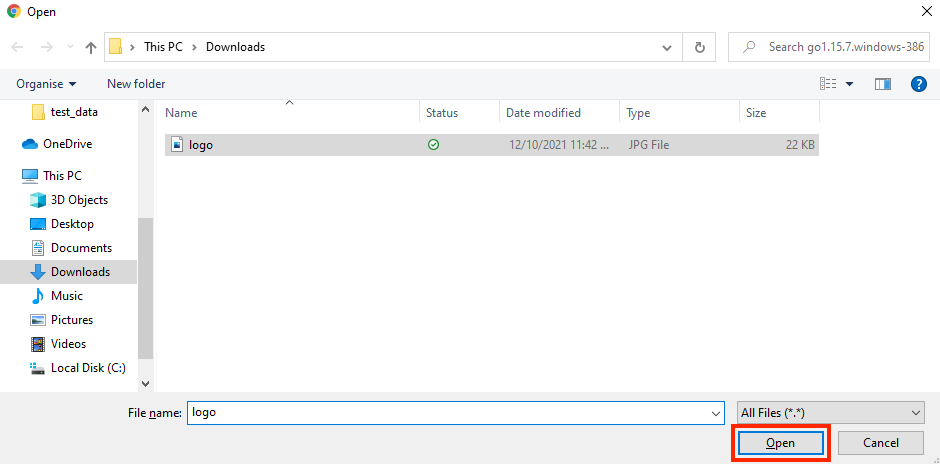
- Select the required logo file and click on the Open button (see Figure 12).
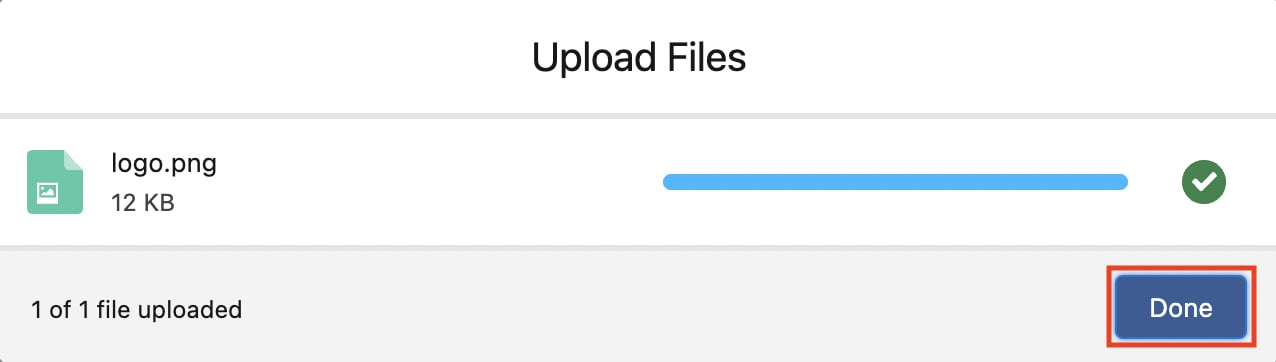
- Click on the Done button (see Figure 13).
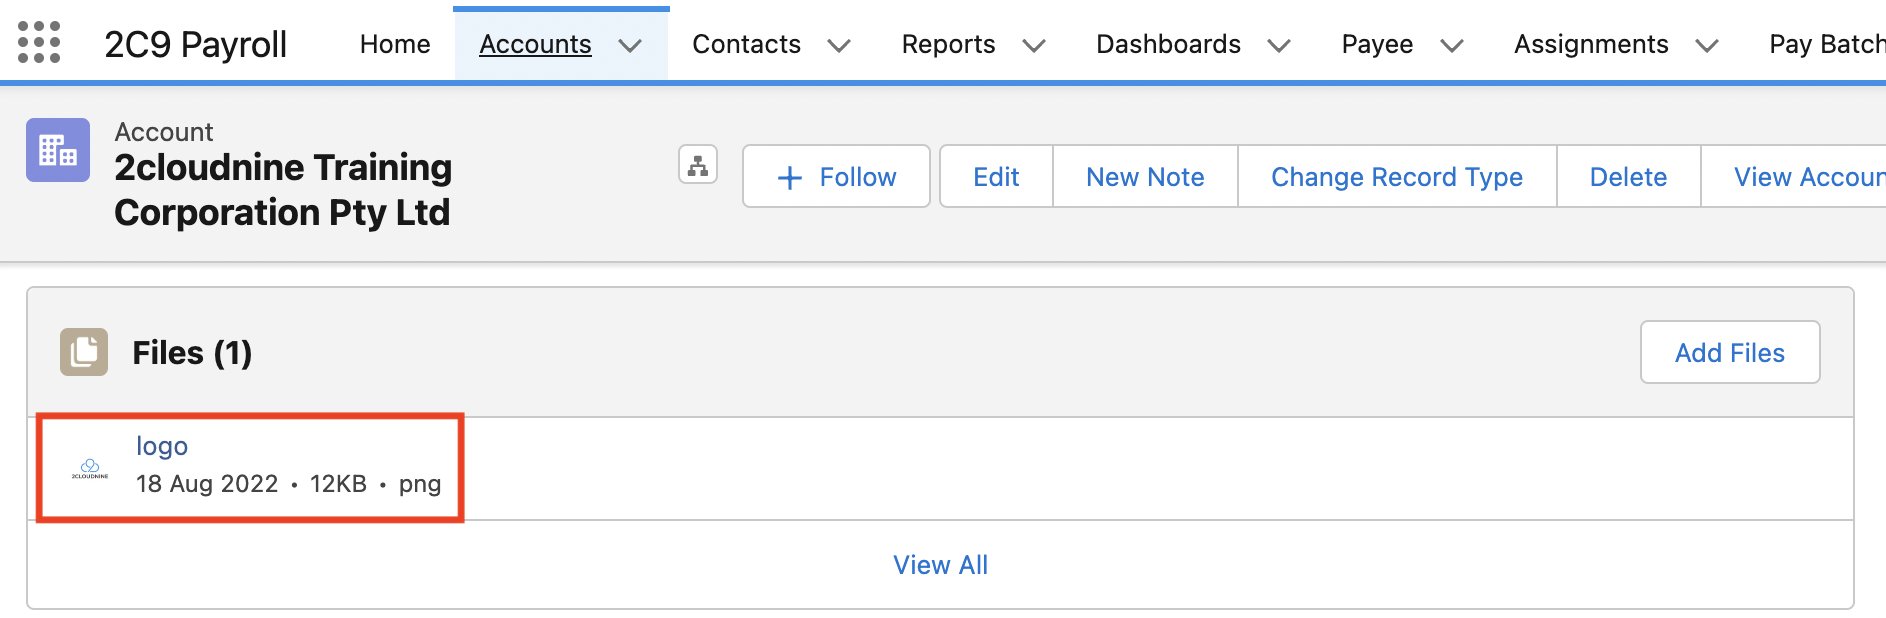
- The logo has been uploaded under the Files tab (see Figure 14).
Payment Entity LogoYou can only attach a .png or .jpg image with the name ‘logo’. This image will be used as the logo on 2cloudnine Payroll Pay Advice PDFs for this Payment Entity.If you attach a logo file to a Pay Advice Template record similar to the Payment Entity record, it overrides the logo attached to the Payment Entity.If two or more logo files are uploaded on the same Payment Entity record, Salesforce will randomly select one of those as the logo on the PDF files.
Field Descriptions
Further Information
- First Published: 25th March, 2022
- Last Published: 29th September, 2026